Using Loreline with VS Code
To write Loreline scripts on your computer, we recommend using Visual Studio Code (VS Code for short). It's a free text editor available on Windows, macOS, and Linux. Combined with the Loreline extension, it gives you syntax highlighting, a live preview of your story, and editing tools, all in one place.
If you just want to try Loreline without installing anything, you can use the online Playground directly in your browser.
Installing VS Code
Head to the official Visual Studio Code website and download the version for your system.
Don't be put off by VS Code's "AI code editor" tagline. You don't need to use any AI features, and we won't be using any here. It's just a free text editor that our Loreline extension runs on.
Open the installer and follow the instructions. Once installed, launch VS Code. You should see a welcome screen.
Installing the Loreline extension
Now let's add Loreline support to VS Code:
- Click the Extensions icon in the left sidebar (it looks like four small squares).
- In the search box at the top, type Loreline.
- Click Install on the Loreline extension.
That's all you need to do. VS Code now knows how to work with .lor files.
The video above walks you through installing the Loreline extension for VS Code step by step. You can see that before installation, VS Code doesn't recognize the
.lorfile syntax, and once Loreline is installed, syntax highlighting appears, and you can even click the ▶ (Play) icon to play the script!
You can also find the extension on the VS Code Marketplace.
Creating your first .lor file
Let's make sure everything works:
- In VS Code, open a folder where you want to keep your scripts: File → Open Folder.
- In the left sidebar, right-click and choose New File. Name it something like
MyStory.lor. - Type a few lines, for example:
barista: Hi there! How are you doing today?
You should see the text light up with colors. That means the extension is working.
To learn the Loreline language, head to the Writer's Guide. It will walk you through everything step by step.
Features
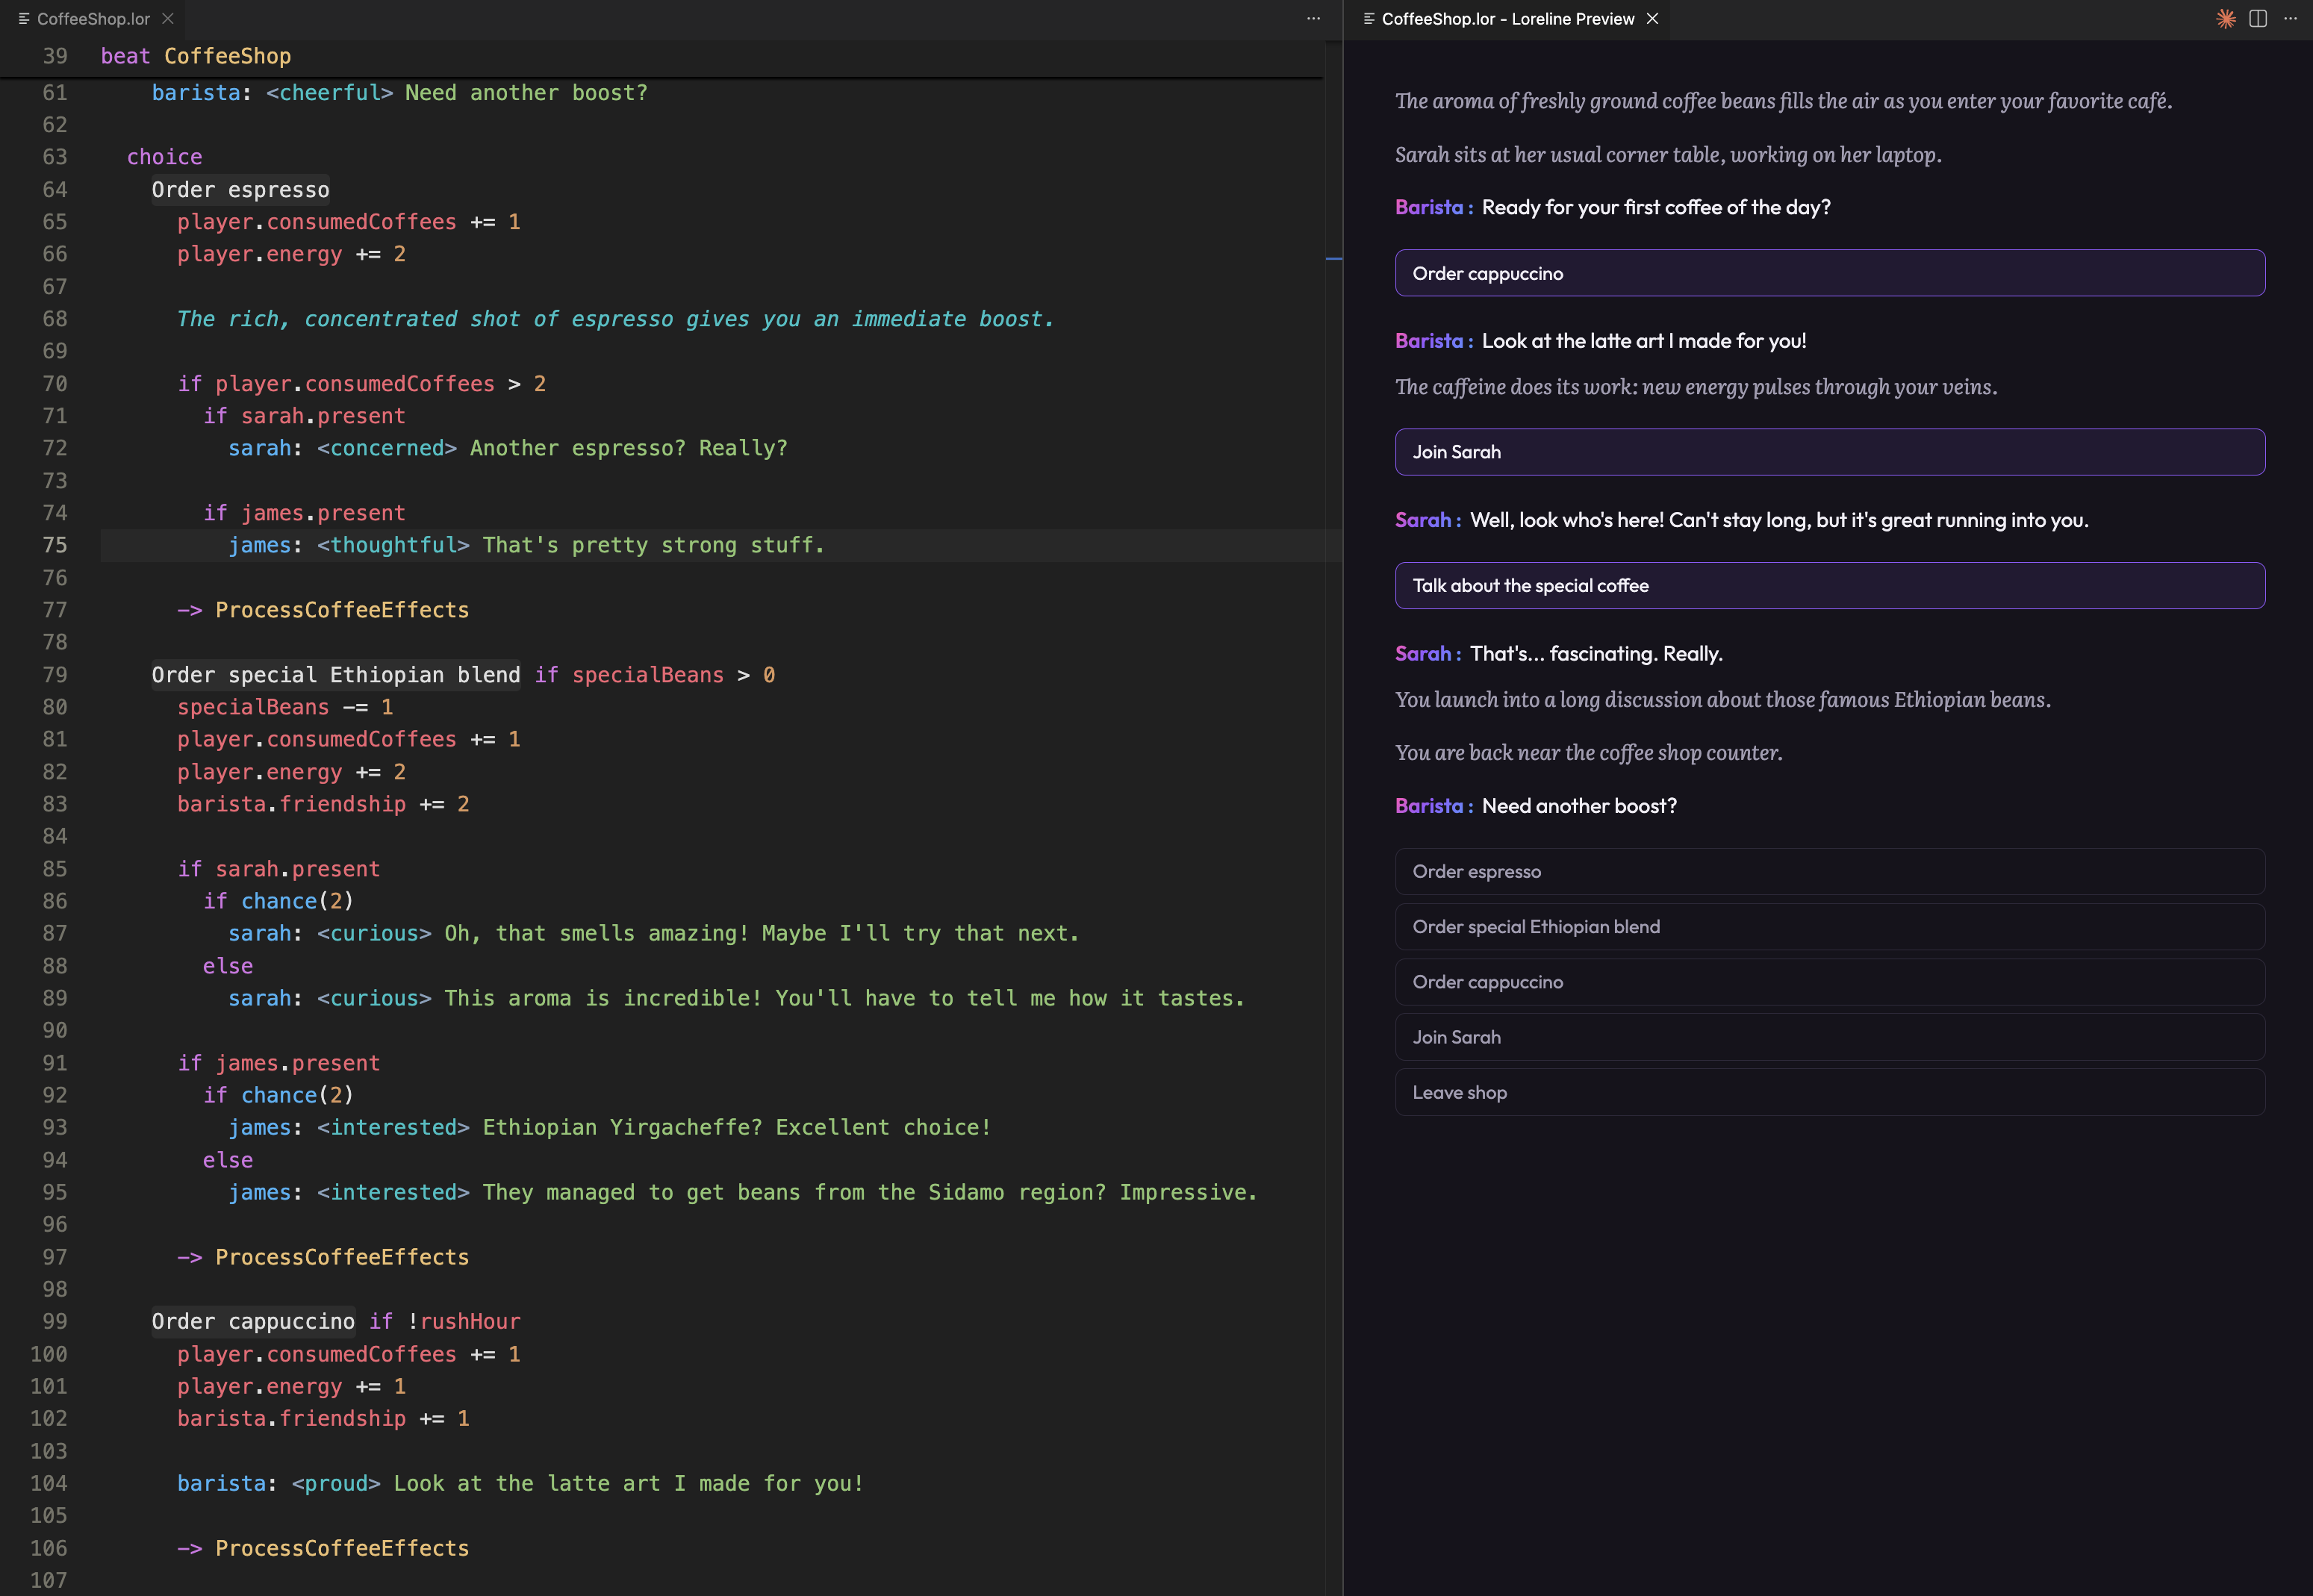
- Live preview: click the ▶ icon in the top-right corner of the editor to play your script in a side panel. The preview updates in real time. Also available via
Loreline: Previewin the command palette. - Suggestions: character names, beat names, and built-in functions are suggested as you type.
- Hover for info: hover over any symbol to see its description.
- Jump to definition:
Ctrl/Cmd+click to jump to a beat or character definition. - Visual cues: choice lines get a tinted background, narrative text appears in italic, plural pipes are highlighted.
Configuration
All settings are under the loreline namespace in VS Code. Open Settings (Ctrl+,) and search for "loreline".
| Setting | Description |
|---|---|
loreline.enableChoiceDecoration |
Enable visual decorations on choice option lines. |
loreline.enableChoiceBackground |
Show a background color on choice option lines. |
loreline.enableChoiceColor |
Apply a text color to choice option lines. |
loreline.choiceBackgroundColor |
Custom background color for choice options (hex). |
loreline.choiceTextColor |
Custom text color for choice options (hex). |
loreline.enableTextStatementDecoration |
Enable styling on narrative text lines. |
loreline.textStatementItalic |
Render narrative text in italic. |
loreline.textStatementColor |
Color for narrative text lines. |
loreline.pluralPipeColor |
Color for the pipe separator in plural expressions. |
Going further
- Writer's Guide: learn the Loreline scripting language from the ground up.
- Built-in Functions: complete reference for functions available in scripts.
- Playground: write and run Loreline scripts directly in the browser.